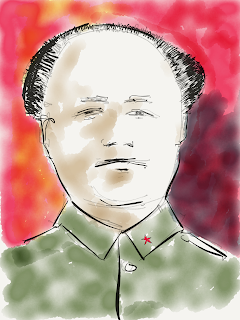
Jeff gave me (belatedly) his Exercise 1 (self portrait) yesterday. I thought it was pretty good - he's now moving on to exercises 2 and beyond.
Monday, 30 May 2016
Sunday, 29 May 2016
Exercise 5 - Fun with Folds!
Folded fabric (or, if you're getting on, skin) is a fascinating brain teaser to draw. Light reflects most strongly at the top of the fold "ridge". Folds aren't parallel, but I've simplified a diagrammatic fold in the sketch below to show basic rendering of a simple fold. Add light source direction, shadowing from one fold to another, undercut (how fabric folds under itself) and other myriad issues to make fold studies a must do when seeking humiliation.
In the detailed rendering below by J. Snow you can see all these complexities beautifully handled.


Now it's your turn - set up your own drapery model still life, it could be clothing, curtains, a cloth. Render it as best as you can using the general idea of keeping the "high points" the lightest and following the fold convergences to their crease points. Not happening? Keep working on it.
Here's a nice one by our friend Raphael. You can just feel that fabric.
And then there's the incomparable Joaquin Alberto Vargas y Chávez "Vargas" (1896-1982) with this lovely fold study below... in this case, the black lace is rendered transparently with shadow at the side and maximum transparency on the ridges.
Exercise 5 - try your own fold study!
Tuesday, 17 May 2016
Exercise 4 - Gesture Drawings
Where contour drawing is slow and painstaking, gesture drawing is mad with abandon. Draw what the figure is "doing" rather than the edges. Draw through the figure quickly showing the essential action, weighting or "gesture" of the pose.
The image above is from the Natural Way to Draw and shows gestural drawing with weight, intent, and movement.
You can practice with a real model or on the site below. Set the "controls" to any way you like, but I'd suggest 30 or 60 seconds with both male and female figures. Clothing is up to you.
http://artists.pixelovely.com/practice-tools/figure-drawing/
Happy drawing!
Sunday, 15 May 2016
Exercise 3 - Contour Studies
| Credit www.jasonwitte.com |
This week we're going to look at "Contour Drawing" using Kimon Nicolaides, The Natural Way to Draw (1941) as a basis for the exercise:
Contour Drawing - 1-2 hours
Different from an "outline", a contour is a careful and painstaking study of an object or grouping, keeping the eye on the subject and the pencil on the paper. In fact, the eye doesn't even look at the paper since it is instead looking a a particular part of the subject. The pencil traces the contour edges of the subject so as to create in the mind of the artist, an unmistakable sense of what edge the pencil is tracing. Nicolaides says to, "exactly coordinate the pencil with the eye" and to "be guided by the sense of touch more than that of sight". An interesting trick to be sure, and one that, when practiced, yields a much stronger sense of connection to a subject, necessary to execute believable drawings.
Set up in a comfortable location with paper of about 15"x20" (40cm x 50cm) and a 3B pencil. Fasten the paper to a hard backing and sit close to your subject. "Wait until you are convinced that the pencil is touching that point on the model upon which your eyes are fastened". Start anywhere and stop anywhere.
 |
| Contour Faces (credit www.youthareawsome.com/contour-drawing/) |
| backpack (credit www.drawing-fun.net) |
here are some that I did last week
Thursday, 12 May 2016
Raphael master copy - Exercise 2
Whew, I learned a lot from this one... turns out Raphael (Sanzio da Urbino) was rather good at his job
 |
| Here's the first one I tried - there was something going wrong somewhere so I abandoned it ... |
 |
| By exploiting the new science of "grid" based technology, I got the proportions more like the original |
 |
| and here is try number 3 with most (but not all) of the grid erased (conté on paper) |
 |
| ok, this one is still way better - but it's RAPHAEL for crying out loud! |
Monday, 9 May 2016
Exercise 2 - Master Drawing Copy
https://blogger.googleusercontent.com/img/b/R29vZ2xl/AVvXsEhCPcz_CoBpqRR-QCM-DzZh90GRAYwtTL6WC5xi00I6lECfPW1qMOI5N7pbCSyQdkPrGojc7Y04WOZhyk3JRTDDoBtklE8ffrYmdnjlj434tptlPWKT4fHBrVJWWVkinU47iKJraUxqjnIk/s1600/Raphael2.JPG
This week, copy this Raphael drawing in your medium of choice ... there's a link above. It would be good to print it and copy at about the same size but if you can handle the scaling, go for it.
Happy drawing! Mark

Exercise 1 - Results!
Subscribe to:
Comments (Atom)


